

One of the things that I dislike about pumpkin carving, though, is the thought of the smaller monsters around an open flame. I just hate knowing that they will want to light the candles in their pumpkins, and I cringe.. even though we are standing right with them, supervising and guiding their hands.
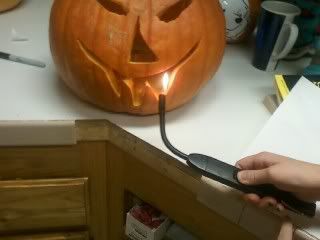
Zippo has come to the rescue this Halloween, with their Flex Neck Utility Lighter! The elongated flexible neck of this lighter makes it possible to light pumpkins through the carving in front, eliminating the possibility of burns by reaching in through the top with a standard lighter or fireplace match.
That's not all Zippo was available to help with, though! They've put together some pumpkin carving tips that are sure to help you succeed with carving the design you're imagining:
Things You'll Need:
- Pumpkin (keep in mind the smaller the pumpkin, the smaller your design needs to be)
- Newspaper (keeps the clean-up to a minimum!)
- Marker
- Stencils (if you really want to get creative, search online for some cool stencils)
- Sharp knife/ spoon (tools of the pumpkin carving trade)
- Small tea-light candle (light up your design so your neighbors can see your creation!)
- Zippo Flex Neck -- with a flexible nozzle, you don’t have to worry about burning your fingers when you bring your carving to life!
Instructions:
- Place a pumpkin flat on its bottom, on a flat surface (so the stem is at the top)
- Draw a circle around the stem with a marker – make sure the circle is large enough so that you can fit your hand through it!
- Cut around the outline with a long, sharp knife
- Lift the newly made lid and remove the flesh of the pumpkin with a spoon – if you’re a fan of pumpkin seeds, you can roast them later on for a healthy snack!
- Rinse the interior, clearing out the remaining flesh, and tip away the waste
- Draw your design on the front of the pumpkin with a marker or draw around an already-made stencil – have your kids sketch out their designs on a scrap piece of paper and ensure they’re happy with it before they transpose it on the pumpkin!
- Insert the tip of your knife into the lines drawn and begin carving your design
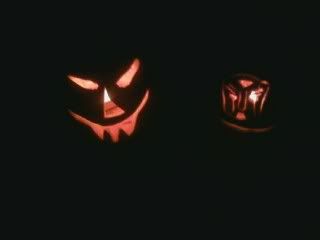
- Once your masterpiece is complete, place the small tea-light candle inside the pumpkin
- Save your fingers from any unnecessary burns by lighting it with a Zippo Fleck Neck. The long, slim, adjustable nozzle will fit right in between the carvings so that you don’t have to remove the candle to light it. Your fingers will thank you, trust us!
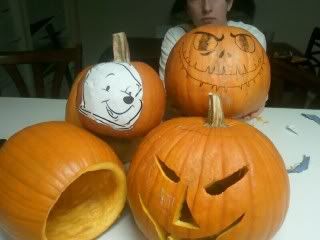
The Monster House wishes you a very happy and safe Halloween! Hope you and your monsters have a wonderful time carving pumpkins, getting dressed up, and trick or treating!
Zippo, Flex Neck, Flex Neck image, and reference to same belong to Zippo and are used here only for purposes of this post. Pumpkin images belong to the blogger. I was sent one Zippo Flex Neck to review. All opinions expressed in this post are my own. I was not compensated in any way for this review.
No comments:
Post a Comment